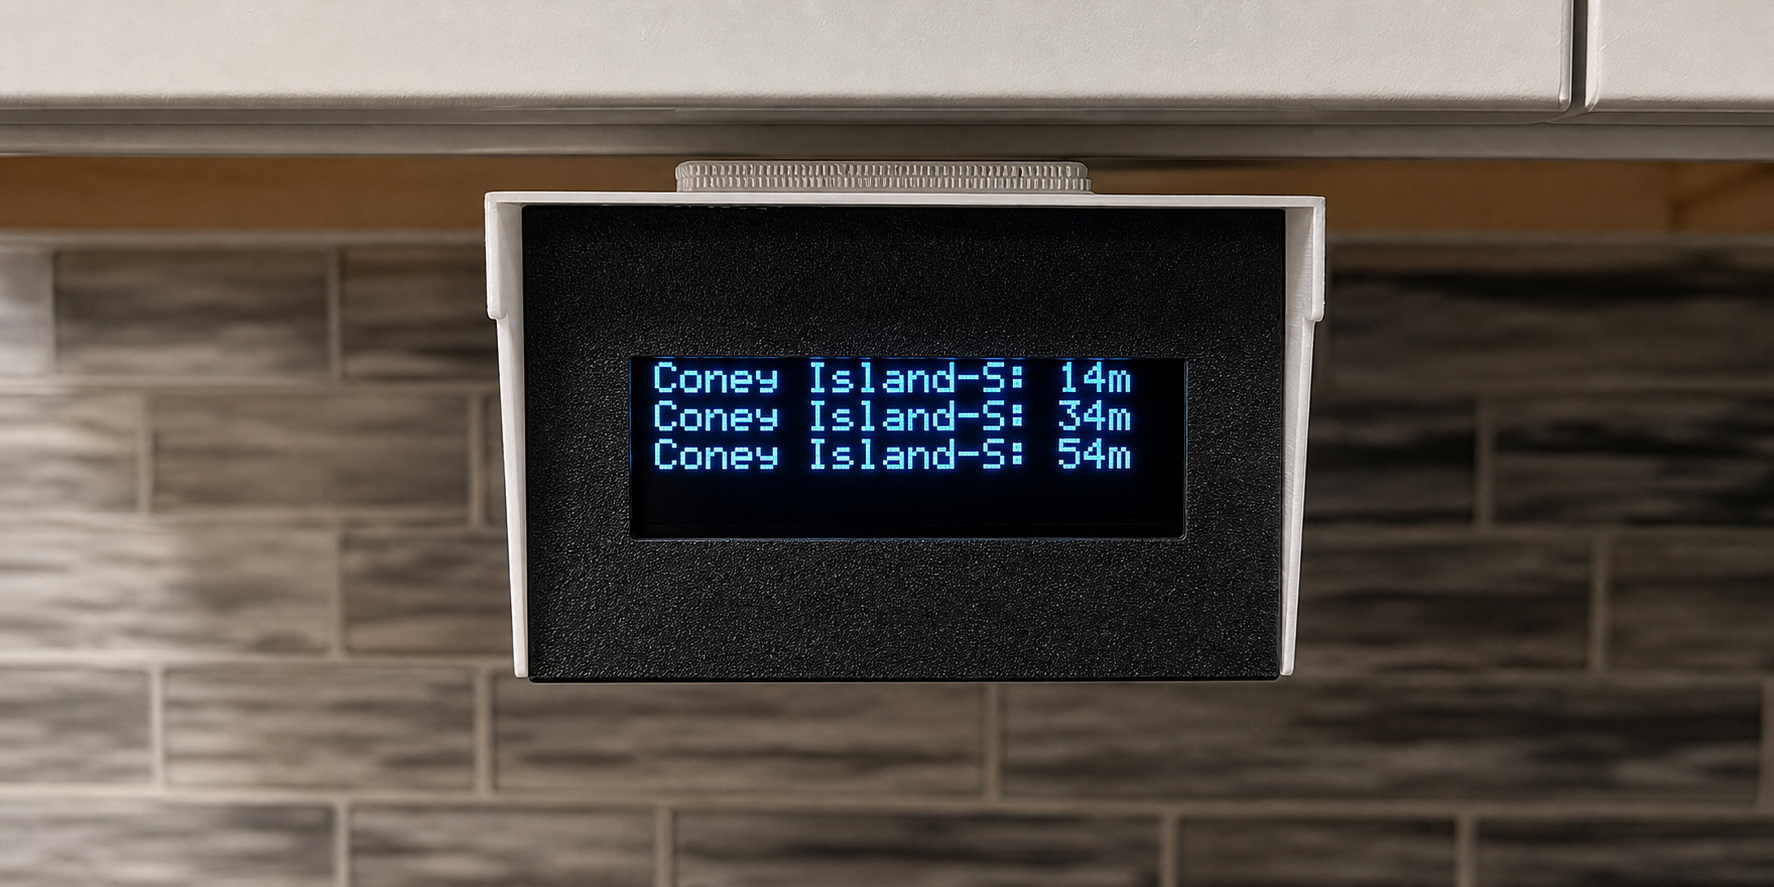
If we’ve met before, you probably know two things about me: I like public transit, and I do not like waiting. These interests are not always compatible. So I decided to spend many weeks building something that might save me a few minutes a day. This is what engineers call a solution.
The idea was a small train arrival board that sits by the door and tells me exactly when to leave. My closest station is exactly 8 minutes away, unless someone stops me to ask for help carrying a cart down the stairs. Then it is 9 minutes, and the train is gone.
Before starting, I had a few requirements. The display needed to support more than one transit system, and I wanted to add new systems over time without reflashing the firmware. The hardware needed to be reproducible, so I could gift boards to friends or let other people build their own. The setup flow needed to be configurable without editing code. And it needed to handle real transit choices, like picking only the branches of a line that actually matter for a given stop.
This project was heavily inspired by Filbot’s real-time BART arrival display. I reused the component choices and 3D model from that project, which let me focus on the parts I wanted to customize: the API, firmware, and PCB.
Normalizing Transit APIs
Transit APIs all answer the same basic question, but they rarely answer it in the same shape.
MBTA was the cleanest of the systems I supported: lines, stops, directions, and predictions are all available through a fairly regular JSON API. MTA was much messier. Subway stops come from static station data, subway arrivals come from GTFS-realtime feeds, and subway direction is encoded by appending N or S to a stop ID. MTA buses use a different system entirely: BusTime/SIRI, with a deeply nested response shape. WMATA had its own split between rail and bus, plus arrival values like ARR, BRD, and --- that needed to be translated into normal arrival times.
I did not want the ESP32 firmware to know any of that. The device should not care whether an arrival came from MBTA JSON, MTA GTFS-realtime, MTA BusTime, or WMATA. It should only know how to ask for lines, stops, directions, and predictions.
That is why I put a small proxy API between the display and the transit agencies. Each agency-specific client handles its own weirdness, then returns the same cleaned-up shape to the device:
class TransitClient(ABC):
    @abstractmethod
    async def fetch_lines(self) -> list[LineSummary]: ...

    @abstractmethod
    async def fetch_stops(
        self,
        route_id: str,
        route_type: Optional[str] = None,
    ) -> list[StopSummary]: ...

    @abstractmethod
    async def fetch_directions(
        self,
        route_id: str,
        route_type: Optional[str] = None,
    ) -> list[DirectionSummary]: ...

    @abstractmethod
    async def fetch_predictions(
        self,
        stop_id: str,
        routes: Optional[set[str]] = None,
        direction: Optional[int] = None,
        limit: int = 10,
        route_type: Optional[str] = None,
    ) -> list[PredictionSummary]: ...
Adding a new transit agency becomes a server-side change instead of a firmware change. As long as the new client implements this interface, the display can use it without learning anything new.
The obvious downside is that a proxy service introduces another moving piece. I tried to make that less fragile by letting the setup page change the API root. If my hosted API ever goes away, someone can point the display at their own self-hosted version. This also made development much easier: I could point the device at a local development server and test a new transit agency without rebuilding or reflashing the firmware.
The proxy also gives the API room to get smarter over time. For example, some terminal stops do not always have a live prediction before a train begins its trip. A future version of the API could fall back to scheduled departures when realtime predictions are missing. If that logic lived on the ESP32, every device would need a firmware update. With the proxy, every project using the API benefits from the improvement automatically.
Breadboarding
The electronics for this project are not especially complicated: an ESP32, a display, power, and a logic level shifter. The level shifter matters because the ESP32 uses 3.3V logic while the display expects 5V signals.
This was still one of my first real breadboarding projects, so there was plenty to get wrong. The display documentation was not as clear as I hoped, and the logic level shifter I bought from AliExpress did not match the reference diagrams I found online. That made orientation surprisingly annoying to verify.
The hardest part was that one wrong wire meant no output at all. Thankfully, my good friend Taha has a lot more electronics experience than I do and helped me understand a bunch of confusing docs.
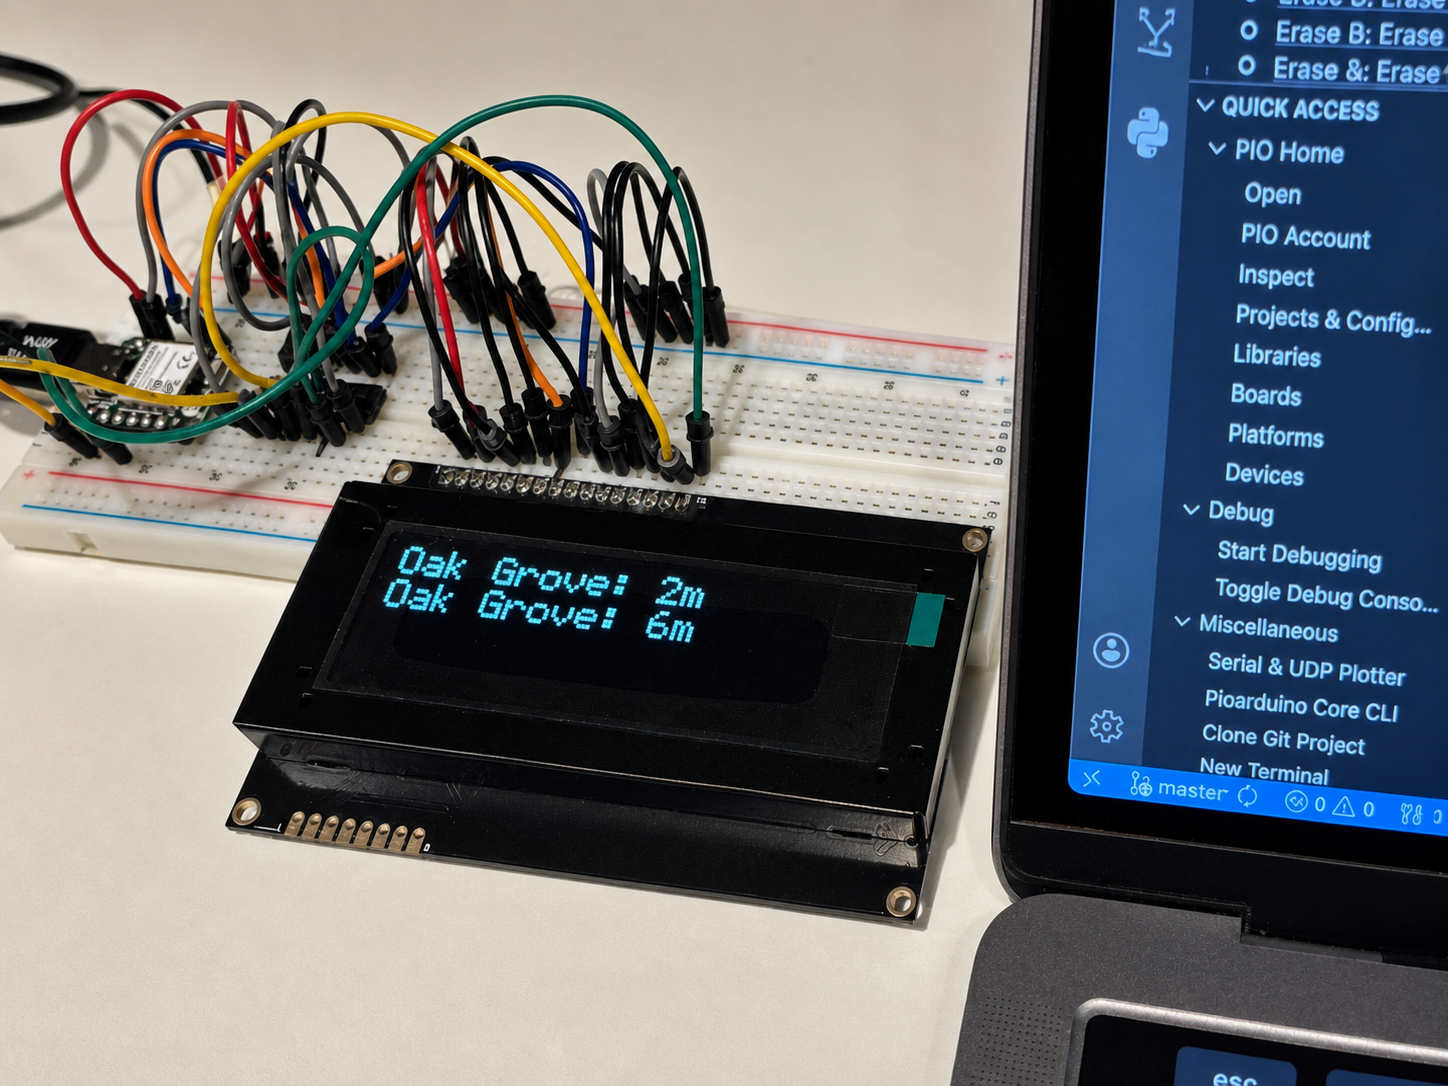
Once I could reliably get text onto the display, the next problem was making the output useful: connecting the device to Wi-Fi, fetching arrivals, and giving it a clean setup flow.
Writing the ESP32 Firmware
Once I could get text onto the display, the next challenge was making the device usable without editing code. I wanted someone to be able to plug it in, connect to a temporary Wi-Fi network, pick their real Wi-Fi, then choose a transit agency, line, stop, direction, and routes from a setup page.
This ended up being more complicated than the actual prediction loop. The setup flow has two phases. First, the ESP32 starts its own Wi-Fi network called Transit-Setup and serves a small web page for entering Wi-Fi credentials. After those are saved, the device connects to the real Wi-Fi network and moves into the train setup flow. Getting that handoff to feel smooth was annoying beecause the phone starts on the ESP32’s local network then the ESP32 becomes a client on the home network, and the browser still needs to land on the next page instead of getting stuck.
The train setup page also had to be dynamic. It starts by loading the supported metro systems from my API, then loads lines for the selected system. Some lines have multiple routes or branches, so the UI lets you choose a subset. From there it fetches only the stops shared by the selected routes, then asks for a direction when the transit system supports one. That flow is why the API normalization was so important. The firmware could build one setup experience around metros, lines, stops, directions, and predictions instead of needing a custom setup page for every agency.
The device stores both Wi-Fi and train configuration in persistent ESP32 preferences, so it can boot straight into normal operation after setup. I also added a local status page, a reconfigure option, and a hard reset path using the device button.
One thing that helped a lot was moving development from the Arduino IDE to the PlatformIO VS Code IDE. Flashing was faster, serial logs were easier to read, and syntax highlighting made the embedded HTML and JavaScript less painful to work with. That mattered a ton because I was repeatedly flashing the device, watching logs, fixing one tiny setup-flow issue, and trying again.
Designing the PCB
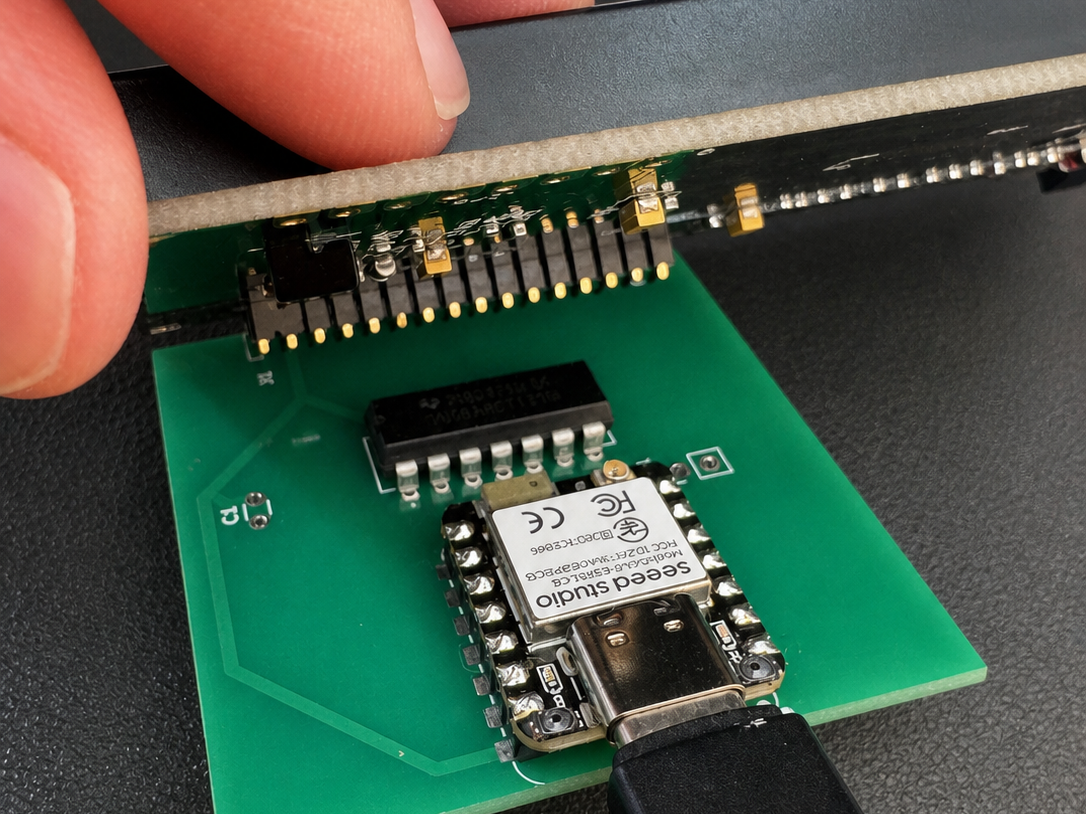
At this point the project worked, but it still looked like a prototype. The breadboard was fragile, hard to reproduce, and not something I wanted sitting by my door forever.
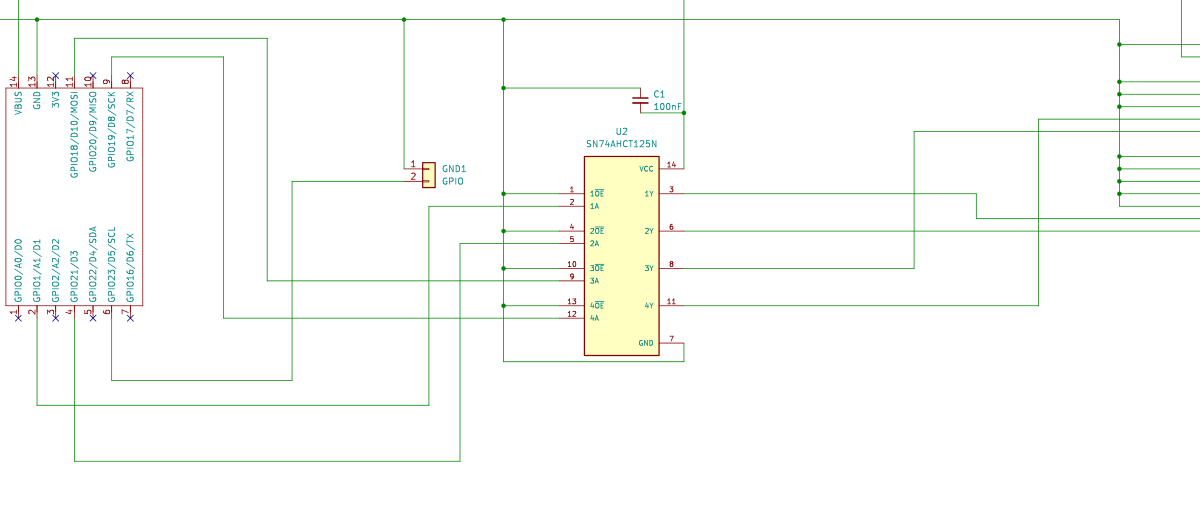
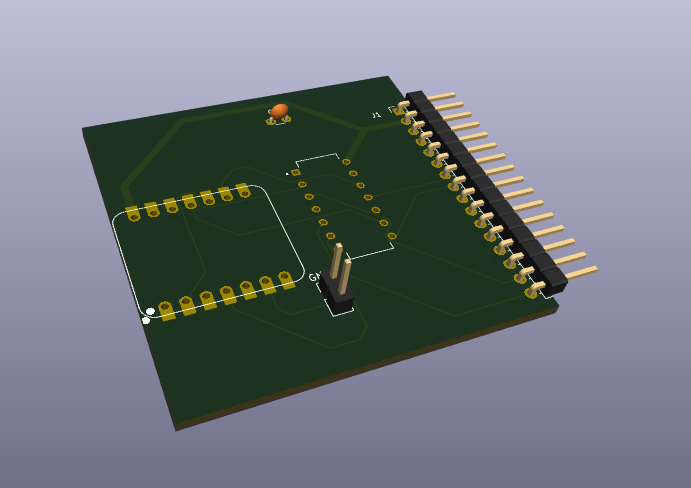
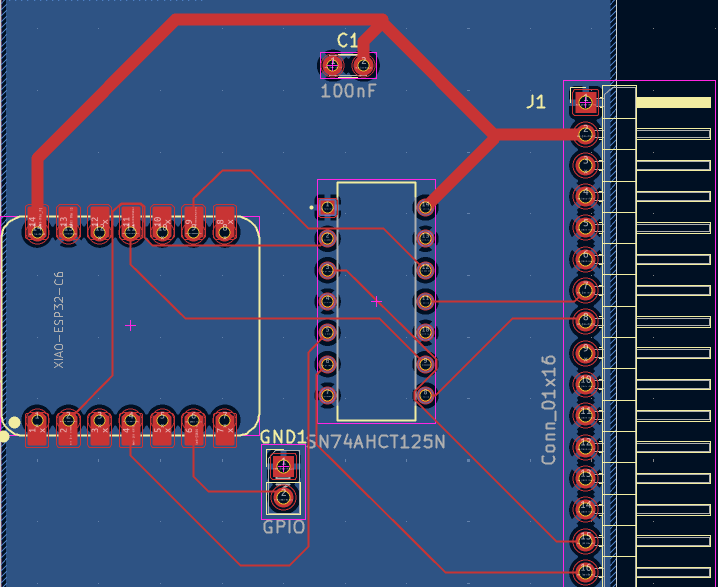
I assumed making a custom PCB would be expensive and intimidating, but after watching a few KiCad tutorials I realized this board was simple enough for a first attempt. The circuit only needed to connect the ESP32, the display, power, and the level shifter.
Designing a PCB felt a bit like packing a suitcase. You know what needs to fit, you roughly know the dimensions, and then you spend a while moving things around until everything has a place and the connections make sense.
I got a lot of helpful advice from Adam, especially around trace widths, ground pours, and checking that the board was actually manufacturable. Once the design looked reasonable, I sent it to JLCPCB. The order was just $9 for 10 boards.
Home Assistant Card
One nice side effect of building the transit API first is that future projects get multi-agency support almost for free. The display was the original reason to normalize the data, but the same API can power anything that needs arrivals.
For example, I also built a Home Assistant card that uses this API. Because the API already knows how to talk to MBTA, MTA, and WMATA, the card does not need separate integrations for each transit agency. It can point at the same server, change the metro_id, and render arrivals from different systems. The live demo below shows that same card rendering MBTA and MTA arrivals side by side.
MBTA
MTA
$ ./wrap-up
I want to end with another thank you to Filbot’s real-time BART arrival display, which gave me a huge head start, and to Taha and Adam for helping me get this from idea to something I can an write about.
There are still a few things I would like to improve. I would love to see more transit agencies added to the API. I also want to make predictions smarter for systems where the realtime feed has blind spots. For example, some MTA lines do not have the same GPS-style tracking as others, so a future version could use historical data to improve predictions after a train leaves a station. Service notes would also be useful, especially for cases like trains running local, delays, or planned closures.
The code is open source here: